This guide shows you how to Integrate Laravel Shopify App with KloudBean using BoostifyThemes’ Noire Theme
Successful e-commerce businesses today require adaptable and scalable solutions which support their expansion needs. Although Shopify ranks among top e-commerce platforms it requires custom integrations to achieve its full potential. The robust PHP Laravel framework plays a critical role in this process. Leveraging both Laravel’s adaptable framework features and Shopify’s advanced commercial tools enables the development of fully customized scalable online stores that align perfectly with specific business needs.
This complete guide explains how to connect your Laravel application to Shopify and deploy it using KloudBean which is a performance-focused hosting solution designed for Laravel. The BoostifyThemes’ Noire Shopify theme which features an elegant minimalist design can be improved through custom Laravel integrations to provide an efficient and robust e-commerce solution.
Understanding Shopify Apps
Shopify apps represent software solutions which expand the capabilities of the Shopify e-commerce platform. Developers use Shopify apps to build solutions which enable store owners to add new functionalities or improve their Shopify admin interface.
Shopify offers two primary categories of apps for extension purposes.
Public Apps
The development of these apps targets distribution to numerous Shopify merchants through the Shopify App Store. Before public apps reach the Shopify App Store for all users they must complete a review process.
Private Apps
Private Apps represent custom applications which are specifically developed for use by only one Shopify store. Private apps serve individual merchants by customizing solutions for their unique business requirements and workflow processes.
Why Combine Laravel with Shopify?
What advantages does integrating Laravel with Shopify provide? Here are the simple benefits:
1. Custom Features
Shopify works well for simple stores but may lack necessary special features for your business. Through Laravel you can develop specific functionalities tailored to your requirements.
2. Easy to Use
Laravel simplifies programming with its straightforward and understandable syntax. Even complex features become manageable.
3. Ready-Made Tools
Laravel provides multiple built-in tools to simplify common tasks such as form handling, user logins and database operations.
4. Grows With Your Business
Your business can handle more customer traffic as Laravel ensures your application remains fast and efficient.
5. Keeps Data Safe
Built-in strong security features protect your customer data within Laravel.
6. Plays Well With Shopify
Laravel provides straightforward integration with Shopify’s API to enable seamless operation of your custom features within your store.
7. Help When You Need It
You can find support from developer communities when you encounter issues because both Laravel and Shopify have extensive online networks where developers exchange solutions.
Getting to Know BoostifyThemes’ Noire Theme
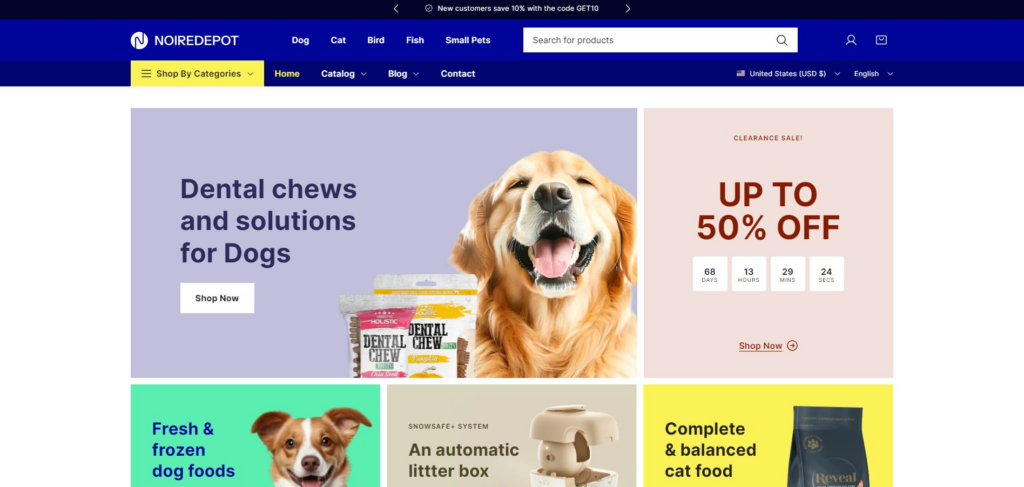
The Noire theme by BoostifyThemes is a premium Shopify theme designed specifically for fashion, apparel, and lifestyle brands. Before we dive into the Laravel integration, let’s explore what makes Noire a standout theme:
Key Features of Noire Theme
- Minimalist Design: Noire features a clean, minimalist aesthetic that puts your products center stage, with ample white space and elegant typography.
- Mobile Responsiveness: The theme is fully responsive, ensuring a seamless shopping experience across devices of all sizes.
- Advanced Product Filtering: Noire includes sophisticated filtering options that help customers find products quickly based on various attributes.
- Quick View Functionality: Shoppers can preview product details without leaving the collection page, streamlining the browsing experience.
- Customizable Sections: The theme offers multiple customizable sections that can be easily rearranged to create a unique storefront.
- Optimized for Conversions: From the intuitive navigation to the streamlined checkout process, Noire is designed to maximize conversions.
- Performance Optimization: The theme is built with speed in mind, ensuring fast load times that enhance both user experience and SEO.
Now that we understand the foundations, let’s dive into the step-by-step process of integrating Laravel with Shopify and enhancing the Noire theme.
Step 1: Setting Up Your Shopify Store with Noire Theme
Creating a Shopify Store
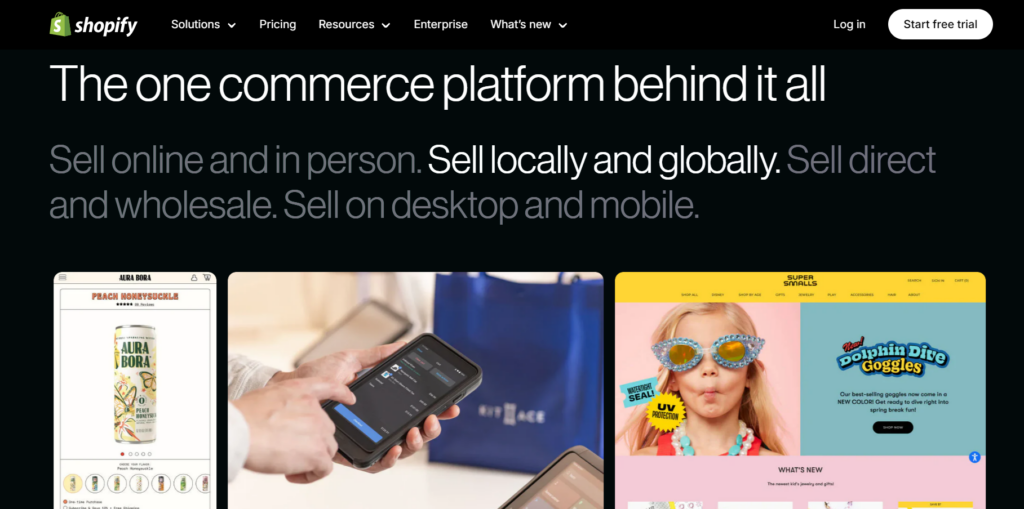
- If you don’t already have a Shopify account, go to Shopify and sign up for a free trial.
- Follow the registration process to create your store.
- Once your store is created, you’ll be redirected to the Shopify admin dashboard.
Installing the Noire Theme
- In your Shopify admin dashboard, navigate to Online Store > Themes.
- Click on Explore free themes or Visit Theme Store to browse available themes.
- Search for “Noire by BoostifyThemes” and select it.
- Click on Add to theme library to purchase and install the theme.
- Once installed, click on Actions > Publish to make it your active theme.
Customizing the Noire Theme
- Click on Customize to open the theme editor.
- Familiarize yourself with the theme’s sections and settings.
- Configure the homepage, product pages, collection pages, and other key elements of your store.
- Add your products, collections, and other content to your store.
- Set up payment gateways, shipping options, and tax settings in the Shopify admin.
With your Shopify store and Noire theme in place, it’s time to create the Laravel application that will extend its functionality.
Step 2: Creating a Laravel Application
Setting Up Your Development Environment
First, make sure your computer has these basic tools installed:
- PHP 7.4 or newer
- Composer (for installing PHP packages)
- Node.js and NPM (for frontend tools)
- Git (for version control)
If you’re not sure how to install these, each has simple download instructions on their official websites.
Creating a New Laravel Project
Let’s create a new Laravel project:
- Open your terminal or command prompt (Command Line on Windows)
- Type this command to create a new Laravel project:
composer create-project --prefer-dist laravel/laravel laravel-shopify-app
- Go to your new project folder:
cd laravel-shopify-app
- Install the frontend tools your project needs:
npm install && npm run dev
Tip: If you see any errors during installation, make sure PHP and Composer are properly installed and accessible from your command line.
Setting Up the Database
Now we need to create a database:
- Create a new empty database using your preferred database tool (like phpMyAdmin)
- Find the
.envfile in your project’s main folder and update these lines with your database details:
DB_CONNECTION=mysql
DB_HOST=127.0.0.1
DB_PORT=3306
DB_DATABASE=your_database_name
DB_USERNAME=your_database_username
DB_PASSWORD=your_database_password
- Set up the basic database tables by running:
php artisan migrate
Installing Required Packages
Now we need to add Shopify support to Laravel:
- Install the Laravel Shopify package by typing:
composer require osiset/laravel-shopify
- Add the package’s settings files to your project:
php artisan vendor:publish --tag=shopify-config
Note: This creates a new file called
shopify-app.phpin your config folder with all the Shopify settings.
Step 3: Configuring Shopify API Integration
Creating a Private App in Shopify
Let’s get your Shopify API access set up:
- Log in to your Shopify admin panel
- Click on Apps in the left sidebar, then click Develop apps
- Click the Create an app button
- Give your app a simple name like “My Laravel Integration” and click Create
- On the next screen, you’ll see your API key and API secret key – save these somewhere safe, you’ll need them soon!
Tip: Take a screenshot of this page so you have your API keys handy.
Configuring Laravel for Shopify Integration
Now let’s connect Laravel to Shopify:
- Open the
.envfile in your Laravel project and add these lines at the end:
SHOPIFY_API_KEY=your_api_key
SHOPIFY_API_SECRET=your_api_secret
SHOPIFY_REDIRECT_URI=https://your-app-url.com/
- Find and open the
config/shopify-app.phpfile. Check that these settings match your API keys:
'api_key' => env('SHOPIFY_API_KEY', ''),
'api_secret' => env('SHOPIFY_API_SECRET', ''),
'api_scopes' => env('SHOPIFY_API_SCOPES', 'read_products,write_products,read_orders,read_customers'),
Note about permissions: The
api_scopessetting controls what your app can do with the Shopify store. The example above allows reading and writing products, orders and customers.
Setting Up Authentication
Now we need to set up user login with Shopify:
- Open the
routes/web.phpfile and replace the existing homepage route with:
Route::get('/', function () {
    return view('welcome');
})->middleware(['verify.shopify'])->name('home');
- Edit your User model file (it’s usually at
app/Models/User.php). Add these lines at the top with the other imports:
use Osiset\ShopifyApp\Contracts\ShopModel as IShopModel;
use Osiset\ShopifyApp\Traits\ShopModel;
- In the same file, change the class line to:
class User extends Authenticatable implements IShopModel
{
    use ShopModel;
    // ... leave the rest of the file unchanged
}
- Run this command to create the necessary database tables:
php artisan migrate
What this does: This sets up your app so users can log in with their Shopify account, and your app will be properly connected to their store.
Step 4: Building Custom Features
Now it’s time to build custom features for your Shopify store using Laravel. Here are some examples:
Product Synchronization
Create a controller to handle product synchronization between your Laravel app and Shopify:
namespace App\Http\Controllers;

use Illuminate\Http\Request;
use Osiset\ShopifyApp\Traits\WithShopify;

class ProductController extends Controller
{
    use WithShopify;

    public function index(Request $request)
    {
        $shop = $request->user();
        $products = $shop->api()->rest('GET', '/admin/api/2023-01/products.json')['body']['products'];

        return view('products.index', compact('products'));
    }

    public function sync(Request $request)
    {
        $shop = $request->user();

        // Implement synchronization logic here

        return redirect()->route('products.index')->with('success', 'Products synchronized successfully!');
    }
}
Custom Analytics Dashboard
Create a dashboard to visualize sales data and customer behavior:
namespace App\Http\Controllers;

use Illuminate\Http\Request;
use Osiset\ShopifyApp\Traits\WithShopify;

class DashboardController extends Controller
{
    use WithShopify;

    public function index(Request $request)
    {
        $shop = $request->user();

        // Fetch orders for the last 30 days
        $orders = $shop->api()->rest('GET', '/admin/api/2023-01/orders.json', [
            'status' => 'any',
            'created_at_min' => now()->subDays(30)->toIso8601String()
        ])['body']['orders'];

        // Calculate metrics
        $totalSales = collect($orders)->sum('total_price');
        $orderCount = count($orders);
        $averageOrderValue = $orderCount > 0 ? $totalSales / $orderCount : 0;

        return view('dashboard.index', compact('totalSales', 'orderCount', 'averageOrderValue', 'orders'));
    }
}
Inventory Management System
Create a controller to manage inventory levels:
namespace App\Http\Controllers;

use Illuminate\Http\Request;
use Osiset\ShopifyApp\Traits\WithShopify;

class InventoryController extends Controller
{
    use WithShopify;

    public function index(Request $request)
    {
        $shop = $request->user();
        $products = $shop->api()->rest('GET', '/admin/api/2023-01/products.json')['body']['products'];

        return view('inventory.index', compact('products'));
    }

    public function update(Request $request, $productId, $variantId)
    {
        $shop = $request->user();
        $inventory = $request->input('inventory');

        $shop->api()->rest('POST', "/admin/api/2023-01/inventory_levels/set.json", [
            'inventory_item_id' => $variantId,
            'location_id' => $request->input('location_id'),
            'available' => $inventory
        ]);

        return redirect()->route('inventory.index')->with('success', 'Inventory updated successfully!');
    }
}
Step 5: Deploying on KloudBean
Now let’s get your app online! We’ll use KloudBean, which makes hosting Laravel apps simple.
Creating a KloudBean Account
- Go to KloudBean.com and click the Sign Up button
- Create your account with your email and password
- Check your email and verify your account
- Log in to your new KloudBean dashboard
Why KloudBean? KloudBean is specially designed for Laravel apps, making deployment much easier than generic hosting.
Creating a New Application
Let’s set up your app on KloudBean:
- In your dashboard, look for the big Create Application button and click it
- For application type, choose Laravel from the dropdown menu
- Fill in these basic details:
- Name: Give your app a name (like “MyShopifyIntegration”)
- PHP Version: Select PHP 8.0 or newer
- Region: Pick the server location closest to your customers
- Resources: Start with the recommended settings
- Click the Create button
Uploading Your Code
KloudBean gives you two easy ways to upload your code:
Option 1: Using Git (Recommended)
If you’re comfortable with Git:
- On your computer, open your terminal in your Laravel project folder
- Set up Git if you haven’t already:
git init
git add .
git commit -m "Initial commit"
- Connect to KloudBean (look in your KloudBean dashboard for the exact URL):
git remote add kloudbean your_kloudbean_git_url
- Upload your code:
git push kloudbean master
Option 2: Using FTP (Simpler option)
If you prefer a visual method:
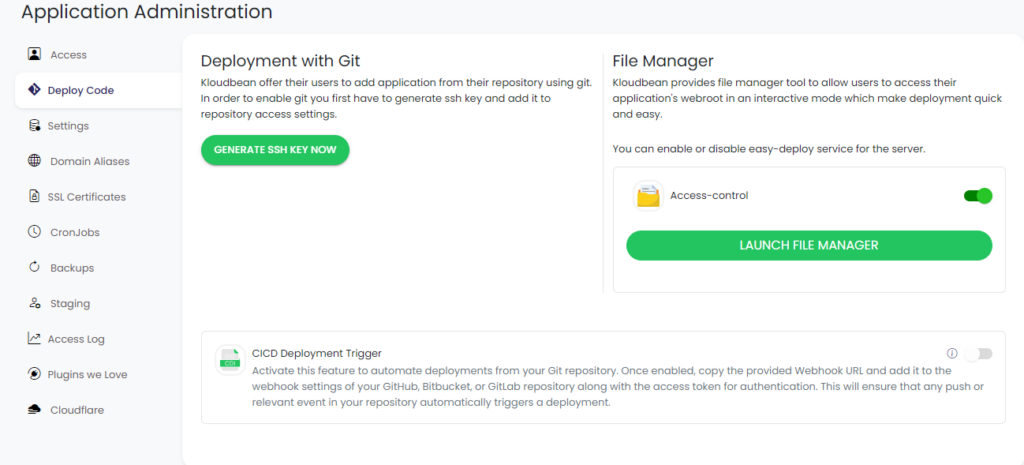
- Download and install FileZilla (a free FTP program) Or Skip third Party Tools, where kloudbean has a option called EasyDeploy where you can direclty manage your server files in GUI mode.
- In your KloudBean dashboard, find your FTP credentials (username, password, host) and for EasyDeploy AKA File Manager you can navigate to Deploy Code under your laravel application settings.
- Connect to your server in FileZilla using those credentials or Directly user File Manager directly to upload the files.
- Upload all your Laravel project files to the directory KloudBean your application directory.
Setting Up Your Online Environment
- In your KloudBean dashboard, click on your application name
- Find and click on the Deploy Code << File Manager tab
- Add these important variables (copy from your local .env file):
- All your Shopify API credentials
- Database settings (KloudBean will provide these)
- App URL and other settings
- Click Save when done
Setting Up Your Database
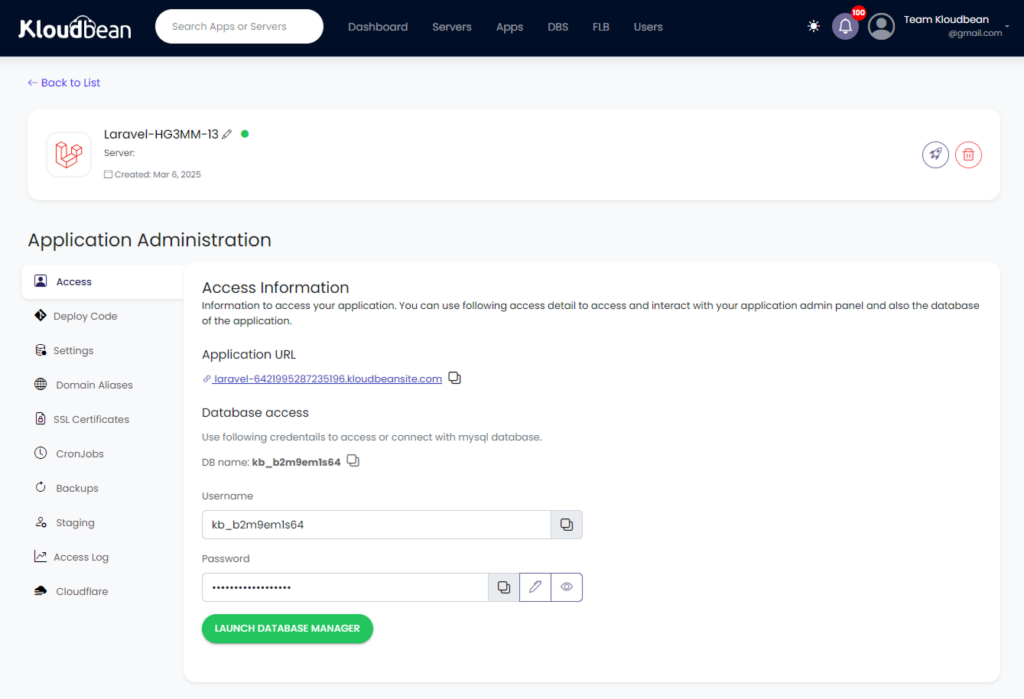
- In your KloudBean dashboard, go to the Database section
- The database should be already created for you – note the details
- To set up your database tables, use Database Manager the in KloudBean and Import the database or use CLI and use this command:
php artisan migrate
Final Steps
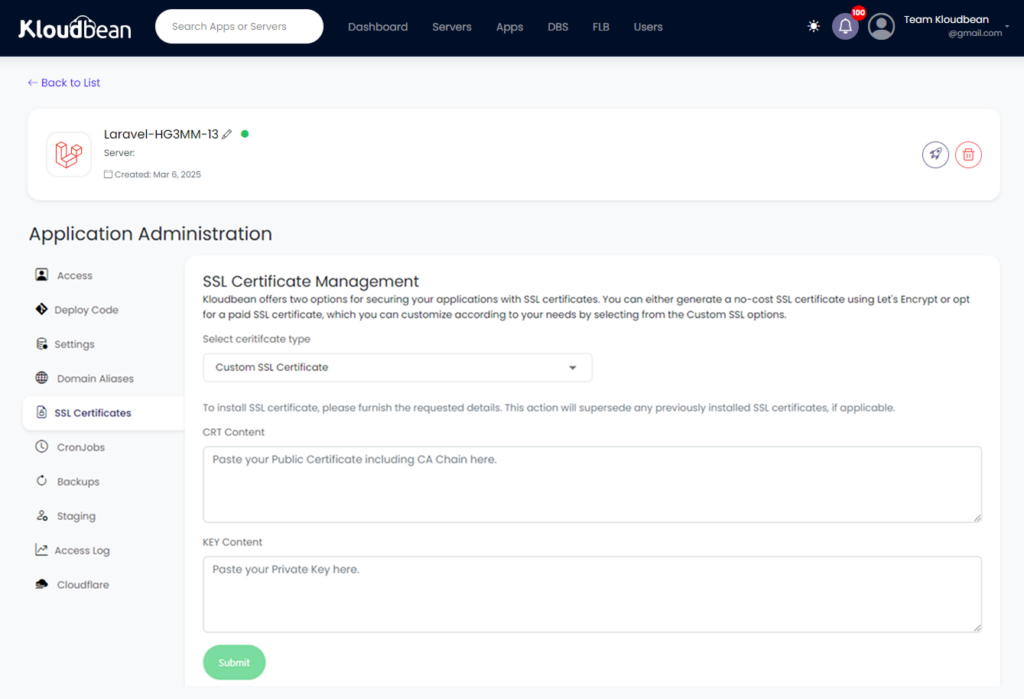
- In the KloudBean dashboard, click on SSL and enable HTTPS for your site
- If your app needs scheduled tasks, set up a cron job under the Scheduler section
- Visit your new app URL (shown in your KloudBean dashboard) to make sure everything works!
Tip: If something doesn’t work, check KloudBean’s logs section to see what might be wrong.
Enhancing Noire Theme with Laravel Integrations
Now comes the fun part! Let’s add some cool custom features to the Noire theme using your Laravel app.
1. Better Product Filtering
The Noire theme already has basic filtering, but let’s make it amazing:
Step 1: Create an API endpoint in Laravel Open your routes/web.php file and add this line:
Route::get('/api/products/filter', 'ProductController@filter');
Step 2: Create the filter function Create a file called ProductController.php in your app/Http/Controllers folder (or edit it if it exists) and add this code:
public function filter(Request $request)
{
    // Get the current shop
    $shop = $request->user();

    // Get all the filter options from the request
    $filters = $request->all();

    // Start with empty parameters
    $queryParams = [];

    // Add collection filter if provided
    if (isset($filters['collection_id'])) {
        $queryParams['collection_id'] = $filters['collection_id'];
    }

    // Add price filter if provided
    if (isset($filters['price_min'])) {
        $queryParams['price_min'] = $filters['price_min'];
    }

    // Get products from Shopify
    $products = $shop->api()->rest('GET', '/admin/api/2023-01/products.json', $queryParams)['body']['products'];

    // Send back the filtered products as JSON
    return response()->json(['products' => $products]);
}
Step 3: Add to your Noire theme Create a new file called custom-filters.js in your Shopify theme assets folder with:
// Simple example - you'll need to adapt this to your specific theme
document.addEventListener('DOMContentLoaded', function() {
  const filterForm = document.getElementById('filter-form');

  filterForm.addEventListener('submit', async function(e) {
    e.preventDefault();

    const formData = new FormData(filterForm);
    const response = await fetch('/api/products/filter?' + new URLSearchParams(formData));
    const data = await response.json();

    // Update the product display with the filtered products
    updateProductDisplay(data.products);
  });
});
2. Product Recommendations
Let’s add personalized “You might also like” recommendations:
Step 1: Create a recommendation endpoint Add this to your routes/web.php file:
Route::get('/api/recommendations', 'RecommendationController@get');
Step 2: Create a simple recommendation system Create RecommendationController.php in your app/Http/Controllers folder:
public function get(Request $request)
{
    $shop = $request->user();
    $productId = $request->input('product_id');

    // Get the current product
    $product = $shop->api()->rest('GET', "/admin/api/2023-01/products/{$productId}.json")['body']['product'];

    // Find products in the same collection
    $collectionId = $request->input('collection_id');
    $similarProducts = $shop->api()->rest('GET', "/admin/api/2023-01/collections/{$collectionId}/products.json", [
        'limit' => 4
    ])['body']['products'];

    return response()->json(['recommendations' => $similarProducts]);
}
Step 3: Add to your product page Edit your product template in Shopify to include:
<div id="product-recommendations">
  <h3>You might also like</h3>
  <div class="recommendations-container"></div>
</div>

<script>
  // Load recommendations when page loads
  fetch('/api/recommendations?product_id={{ product.id }}&collection_id={{ product.collection_id }}')
    .then(response => response.json())
    .then(data => {
      // Display the recommended products
      const container = document.querySelector('.recommendations-container');
      // Add code to display products in your theme's style
    });
</script>
3. Inventory Alerts
Let’s notify customers when items are back in stock:
Step 1: Create a notification system Add these routes to your routes/web.php:
Route::post('/api/notify-me', 'InventoryController@notifyMe');
Route::post('/webhooks/inventory', 'InventoryController@handleInventoryUpdate');
Step 2: Create the controller Create InventoryController.php in your app/Http/Controllers folder:
public function notifyMe(Request $request)
{
    // Save customer email and product info to database
    DB::table('inventory_alerts')->insert([
        'email' => $request->input('email'),
        'product_id' => $request->input('product_id'),
        'variant_id' => $request->input('variant_id'),
        'created_at' => now()
    ]);

    return response()->json(['success' => true]);
}

public function handleInventoryUpdate(Request $request)
{
    $payload = $request->getContent();
    $data = json_decode($payload, true);

    // If inventory is now available, send notifications
    if ($data['available'] > 0) {
        $alerts = DB::table('inventory_alerts')
            ->where('variant_id', $data['inventory_item_id'])
            ->get();

        // Send emails to customers (simplified example)
        foreach ($alerts as $alert) {
            Mail::to($alert->email)->send(new InventoryAlert($data));
        }
    }

    return response()->json(['success' => true]);
}
Step 3: Add to out-of-stock products Add this to your product template for out-of-stock items:
{% if product.available == false %}
  <div class="back-in-stock">
    <h4>Notify me when back in stock</h4>
    <form id="notify-form">
      <input type="email" placeholder="Your email" required>
      <input type="hidden" name="product_id" value="{{ product.id }}">
      <input type="hidden" name="variant_id" value="{{ product.selected_variant.id }}">
      <button type="submit">Notify Me</button>
    </form>
  </div>
{% endif %}
Note: These are simplified examples. You’ll need to adapt them to work with your specific Noire theme structure and styling.
Why Choose KloudBean for Laravel Shopify APP
Wondering why KloudBean is the best choice for hosting your Laravel Shopify Mobile app? Here are the simple benefits:
1. Already Set Up for Laravel
KloudBean comes pre-configured with everything Laravel needs:
- Fast PHP processing for quick page loads
- Built-in caching to make your app speedy
- Tools to handle background tasks automatically
- Database systems ready to go
This means you don’t have to spend hours configuring servers – just upload your code and it works!
2. Super Easy Updates
Once your app is running, updating it is simple:
- Just click a button in the dashboard
- Or push your code with Git
- Your site updates without downtime
No complicated deployment steps or server commands needed.
3. Grows As Your Store Grows
When your Shopify store gets popular:
- KloudBean lets you add more server power with a few clicks
- Your app stays fast even during sales and busy periods
- No need to migrate to a new hosting provider
4. Keeps Your Data Safe
Never worry about losing your work:
- Automatic backups happen regularly
- Restore your site quickly if something goes wrong
- Security updates are handled for you
5. Help When You Need It
If you get stuck or have questions:
- Real support team available 24/7
- Get help from Laravel experts who understand your needs
- No waiting days for answers
6. More Affordable Than Others
Compared to similar services like Cloudways:
- KloudBean costs less for the same features
- No hidden fees or confusing pricing tiers
- Pay only for what you need
KloudBean makes hosting Laravel Shopify apps simple and stress-free, so you can focus on building great features for your store instead of worrying about technical hosting details.
Handling Errors and Exceptions
When integrating Laravel with Shopify, proper error handling is crucial to ensure a smooth user experience. Here are some best practices:
1. Use Laravel’s Exception Handling
Laravel provides robust error and exception handling out of the box. Customize the App\Exceptions\Handler class to handle specific exceptions:
namespace App\Exceptions;

use Illuminate\Foundation\Exceptions\Handler as ExceptionHandler;
use Osiset\ShopifyApp\Exceptions\MissingShopDomainException;
use Throwable;

class Handler extends ExceptionHandler
{
    public function register()
    {
        $this->reportable(function (Throwable $e) {
            //
        });

        $this->renderable(function (MissingShopDomainException $e, $request) {
            return redirect()->route('login');
        });
    }
}
2. Implement API Error Handling
When making API calls to Shopify, wrap them in try-catch blocks:
try {
    $products = $shop->api()->rest('GET', '/admin/api/2023-01/products.json')['body']['products'];
} catch (\Exception $e) {
    // Log the error
    \Log::error('Shopify API Error: ' . $e->getMessage());

    // Handle the error appropriately
    return back()->with('error', 'Unable to fetch products. Please try again later.');
}
3. Set Up Monitoring and Logging
Implement comprehensive logging to track errors and issues:
\Log::channel('shopify')->info('Product sync completed', [
    'shop' => $shop->name,
    'products_count' => count($products)
]);
4. Rate Limiting
Be mindful of Shopify’s API rate limits and implement rate limiting in your application:
public function syncProducts(Request $request)
{
    $shop = $request->user();

    // Get rate limit details from the last API call
    $callsLeft = $shop->api()->getLastCallLimits()['left'];

    if ($callsLeft < 10) {
        // If we're close to the limit, delay the process
        return back()->with('warning', 'API rate limit approaching. Please try again in a few minutes.');
    }

    // Proceed with the sync
}
Conclusion
Integrating Laravel with Shopify and deploying it on KloudBean opens up a world of possibilities for creating custom e-commerce experiences. By enhancing BoostifyThemes’ Noire theme with custom Laravel integrations, you can build a unique, powerful online store that stands out from the competition.
In this guide, we’ve covered the entire process from setting up your Shopify store with the Noire theme to creating a Laravel application, integrating with the Shopify API, building custom features, and deploying on KloudBean. We’ve also explored how to enhance the Noire theme with Laravel integrations and handle errors and exceptions.
By leveraging the flexibility of Laravel, the e-commerce capabilities of Shopify, the elegant design of the Noire theme, and the performance of KloudBean hosting, you can create a scalable, customized e-commerce solution that meets your specific business needs.
Ready to get started? Sign up for KloudBean today and take your Shopify store to the next level with Laravel integration!
Need help with your Laravel Shopify integration? Contact our expert team at KloudBean for personalized assistance and support. We’re here to help you build the perfect e-commerce solution for your business.