Joomla is an open-source platform home to millions of websites. If you’re familiar with it, you’ll likely have experienced the features and flexibility this Content Management System (CMS) offers.
However, WordPress, with its extensive array of plugins, user-friendly interface, and vast community, has led many Joomla users to contemplate a switch.
In this article, we will explore the reasons why someone might migrate from Joomla to WordPress and take a look at some of the concerns that come with this. Potential data loss, website disruptions, and the intricacies of the migration process are understandable worries – but we’ll explain everything you need to know to make the whole process easier.
Joomla vs. WordPress
Joomla has gained a fair level of popularity since its release in 2005. However, as your website changes over time, you might find yourself facing some challenges.
While Joomla stands as a popular CMS, particularly favored for its robust support for multilingual functionality (with an impressive 70 translation packs), it often falls short when compared to the widespread adoption and versatility of WordPress.
The interface of Joomla can be perceived as complicated, posing a challenge for users seeking a user-friendly experience. It also may not be the most suitable choice for those looking to run a blog as part of their website, as it lacks the seamless blogging capabilities that WordPress offers.
Joomla tends to have fewer extensions and design options compared to its WordPress counterpart. Some users find that they ‘outgrow’ Joomla relatively quickly, highlighting limitations in scalability and adaptability.
Let’s see how WordPress can address these concerns:
- Exceptional Popularity: WordPress powers 43.2% of the internet’s websites. This popularity shows its reliability and widespread acceptance across the internet.
- User-Friendly Interface: WordPress values simplicity with its user-friendly interface, making it easy for users to navigate and manage websites without a steep learning curve. This is particularly beneficial for large teams, such as those in marketing, as it allows them to update content smoothly without needing developers for every small change.
- Vast Array of Plugins: Whatever you need for your website, chances are there’s a plugin to make it happen.
- Strong Community Support: There is a thriving community of WordPress users. This community support is a great resource for troubleshooting problems.
If you’re still unsure whether a move to WordPress is best for you and your business, take a look at our article outlining the pros and cons of choosing WordPress as your CMS.
What You Should Consider Before Migrating to WordPress
When migrating from Joomla to WordPress, before anything else, you need careful planning.
Choosing a Hosting Provider and Registering Your Domain
While you will currently have hosting for your Joomla site, it’s important to ensure that it supports WordPress as well. This is also the perfect opportunity to explore new hosting providers, especially if you’re not completely satisfied with your current host. Look for a host that:
- Provides migration support.
- Has high uptime.
- Offers reliable performance.
- Has a user-friendly control panel.
- Offers excellent overall value.
After choosing a hosting provider, the next step is to register your domain. If you already have a domain, there’s no need to acquire a new one. Instead, you simply need to update your DNS settings to point to your new WordPress site. Once the domain is set up, you’ll be ready to proceed with installing WordPress and initiating a smooth migration process.
Consider Using a Specialist Agency To Ensure a Smooth Transition
Migrating from Joomla to WordPress can be complicated, and various challenges will come up along the way. We recommend engaging with a specialist agency, to avoid any chance of data loss or performance issues.
Multidots is a trusted agency and WordPress VIP Gold partner. Our expertise in database migration ensures 100% data integrity through manual processes. Choosing Multidots means removing all worries about the intricacies of the migration process – we handle it all. Your data, the performance of the new website, and the security of your online space will be in our capable hands, allowing you to focus on what you do best – growing and managing your online presence.
Step-by-Step Guide to Migrating Your Site From Joomla to WordPress
Step 1: Install the Plugin
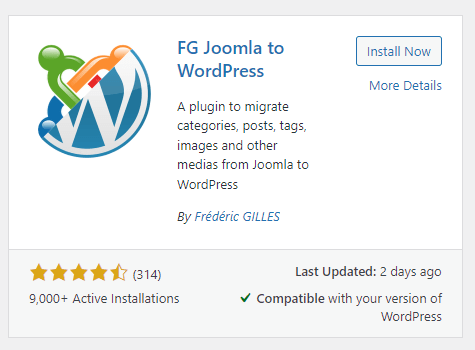
First things first, you will need to download the FG Joomla to WordPress plugin, as WordPress doesn’t directly support migration from Joomla. If you don’t want to have the same content structure on your new site, then unfortunately the plugin won’t be suitable and you will need to manually migrate the data.
Step 2: Find Out Joomla Database Parameters
The FG Joomla to WordPress plugin requires access to your Joomla website’s database because this is where all your site’s content (such as posts, pages, categories, and images) is stored. By accessing the Joomla database, the plugin can retrieve your content and import it into your new WordPress site.
Your Joomla database parameters can be found in the configuration.php file, which is located in the root directory of your Joomla installation. This file contains all the necessary details to connect to the database. The parameters you’re looking for include:
- Host Name (host): This is the server on which your Joomla database is hosted, often something like localhost.
- Database Name (db): The database name where your Joomla content is stored.
- User (user): The username used to access the database.
- Password (password): The password associated with the database user.
- Database Prefix (dbprefix): Joomla tables in the database usually have a prefix, which is a short string appended to the beginning of each table name.
Remember: Backup your Joomla site before you start the migration process. This will save any content should something go wrong.
Step 3: Migrate the Joomla Content Using the Importer
The plugin’s importer function will help you to reliably transport your content. Choose the types of content you wish to import – posts, categories, images, and more. Start the importing process.
Step 4: Modify Internal Links
After importing content from Joomla to WordPress, the internal links within your content might still point to the old Joomla URLs. Internal links are those that link to other pages or resources within your website.
Since WordPress and Joomla may have different URL structures, these links can lead to incorrect destinations or broken links on your new WordPress site. Resolve this by scrolling to the After the migration section and clicking on Modify internal links to ensure everything works how it should.
Step 5: Adjusting Permalinks
While you can modify permalinks at any point, you should do so immediately after migration to prevent broken links from affecting your SEO.
Changing permalinks is an important aspect of optimizing your website for visitors and search engines. Permalinks are the permanent URLs that point to specific pages or posts on your website.
To update permalinks in WordPress, go to your dashboard, Settings → Permalinks, and choose a structure. You can also customize the permalink structure for individual posts or pages when creating or editing them.
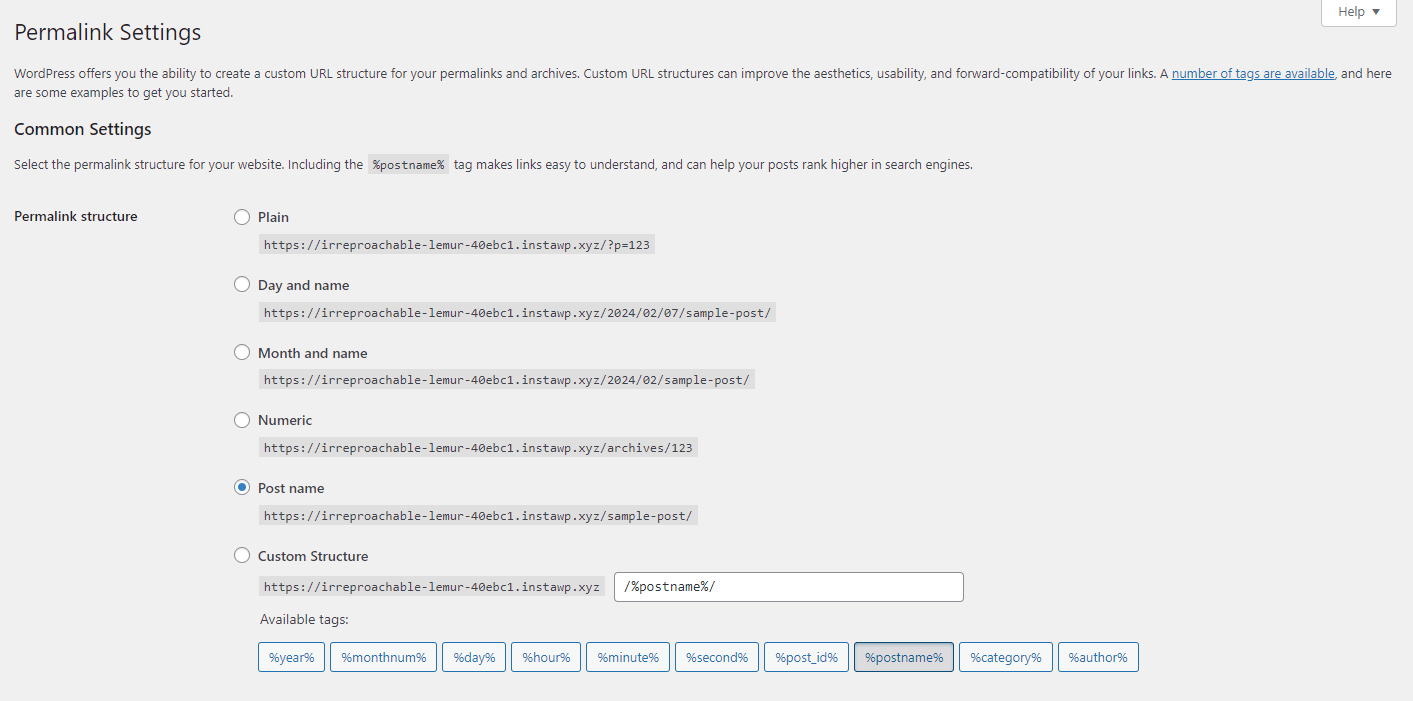
Remember, optimizing permalinks is just one aspect of SEO. It’s important to focus on high-quality content, a user-friendly website structure, and other SEO best practices to improve your site’s visibility and user experience.
Step 6: Verifying the Migration
Once the import process is complete, verify that all your content – posts, pages, images, and links – has been successfully migrated. Check your WordPress site to ensure everything appears as it should.
Step 7: Repoint Your Domain Towards WordPress
After successfully migrating your content to WordPress, it’s time to repoint your domain to ensure that visitors are directed to your new WordPress site. To do this:
- Access Your Domain Registrar Account
Log in to your domain registrar’s account or hosting provider, where you initially purchased or managed your domain.
- Locate DNS Settings or Domain Management
Find the section in your account dashboard related to DNS settings or domain management. The exact location may vary depending on your registrar, so refer to their documentation if needed.
- Update Name Servers
Look for the option to update or change name servers. Replace the existing name servers with the ones provided by your WordPress hosting provider. These name servers will point your domain to your new WordPress site.
Pending Certifications
RunPod is in the process of getting SOC 2, ISO 27001, and HIPAA. We aim to have all three by early Q4, 2024.

SOC 2

ISO 27001

HIPAA
- Save Changes
Once you’ve entered the new name servers, save the changes. Note that DNS changes may take time to propagate across the internet, so be patient. This process could take from a few hours to a couple of days.
- Verify Domain Repointing
After the DNS changes have propagated, visit your domain in a web browser. Ensure that it now displays your new WordPress site. If the site doesn’t appear correctly, double-check the name server settings in your domain registrar account.
Step 8: Customize Your New WordPress Site
While your new WordPress site comes with a default theme, it’s entirely up to you to customize it. Choose from various WordPress themes and install the one that best suits your aesthetic. If your business requires additional functionality or has unique requirements, a skilled WordPress developer, such as those at Multidots, can tailor the website to meet your specific needs and ensure it aligns seamlessly with your business goals.
